Getting Started
Quick Start
macOS
# 1. Install via Homebrew
brew tap vfarcic/tap && brew install dot-agent-deck

# 2. Launch the dashboard (hooks are auto-installed for detected agents)
# Your previous workspace is restored automatically
dot-agent-deck
Linux
# 1. Install via Homebrew (if available)
brew tap vfarcic/tap && brew install dot-agent-deck

# 2. Launch the dashboard (hooks are auto-installed for detected agents)
# Your previous workspace is restored automatically
dot-agent-deck
Windows
Native Windows is coming soon. For now, install WSL and follow the Linux instructions inside your WSL shell.
Tip: Prebuilt binaries and source builds are also available for macOS and Linux. See all install options.
Once the dashboard is running, press ? inside the app to see all shortcuts. The dashboard is also fully mouse-clickable: a button bar along the bottom exposes the main commands (each labelled with its keyboard shortcut), and cards, tab headers, dialogs, the directory picker, and forms all respond to clicks. See Keyboard Shortcuts → Mouse.
On launch, dot-agent-deck installs Claude Code / OpenCode hooks automatically for whichever agents it detects. See Troubleshooting if you need to manage them manually.
Launching
Running dot-agent-deck opens a two-column layout with native embedded terminal panes:
- Left (1/3) — the dashboard, displaying a card grid of agent sessions
- Right (2/3) — agent panes where Claude Code or OpenCode instances run (stacked by default, toggle to tiled with
Ctrl+t)
How it runs
The deck is a TUI on top of a small background daemon. The first dot-agent-deck invocation auto-spawns the daemon and connects to it over a per-user Unix socket — you don't have to start anything manually, and you don't have to clean anything up. The same daemon backs both local runs and dot-agent-deck connect (remote) sessions; there is no separate "local mode".
The daemon owns the agent processes, which has one user-facing consequence: closing the TUI is a detach, not a kill. Your agents keep running. Reattach with dot-agent-deck later and the dashboard rehydrates with the agents still in their previous state.
About 30 seconds after both the TUI and every managed agent are gone, the daemon exits on its own and the socket is cleaned up. Override the window with DOT_AGENT_DECK_IDLE_SHUTDOWN_SECS (in seconds; set 0 to disable idle shutdown and keep the daemon up indefinitely).
Basic Workflow
- Launch the dashboard with
dot-agent-deck - Press
Ctrl+nto open a new pane — pick a directory, give the pane a name, and enter the command to run (typicallyclaudeoropencode) - Watch the agent's status, tool calls, and prompts update on the dashboard in real-time
- To type into an agent, move keyboard focus into its pane: press
Ctrl+dto enter command mode, then eitherj/k(orDown/Up) to cycle through cards or1–9to jump directly to a card - To close the pane you're currently working in, press
Ctrl+w— it closes the selected card and its pane, even while you're still typing in it. The dashboard tab itself can't be closed.
Tip: The command can be any shell command, but real-time status, tool, and prompt tracking on the dashboard only work for
claudeandopencode(the agents Agent Deck installs hooks for).
Tip: Press
Ctrl+dfrom any pane to enter command / navigation mode.
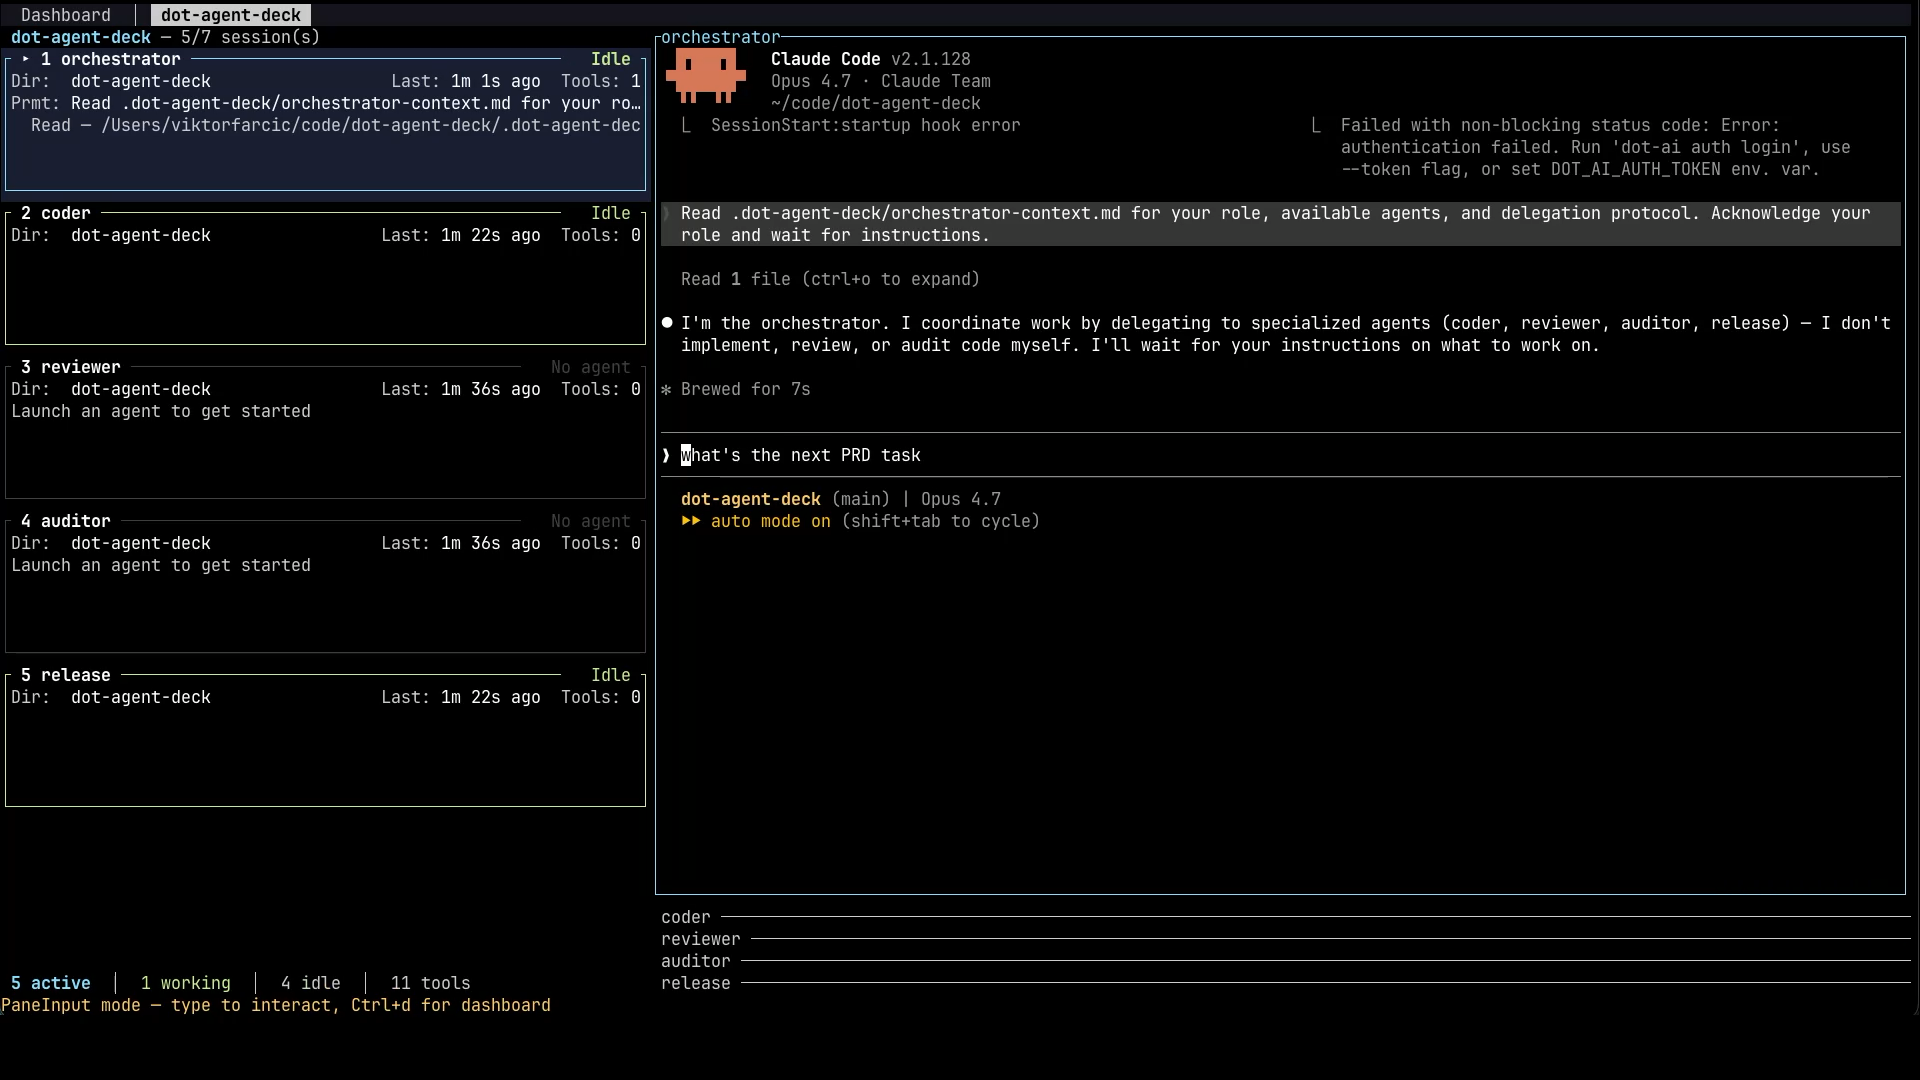
Orchestration
Orchestrations let you run a pipeline of AI agents where a designated orchestrator coordinates work across specialist workers — a coder, a reviewer, an auditor, a release agent, or any roles that fit your workflow. Each worker runs in its own pane with its own model and instructions, working independently and reporting back when done. You set the pipeline up once in .dot-agent-deck.toml and the deck handles the rest.
The fastest way to get the config is to let an agent generate it: press Ctrl+d then g on the dashboard, choose Yes, and the agent analyzes your project and proposes a config with suitable roles. Treat the result as a starting point and tune it as you learn what works for your project.
Once you have a config, starting an orchestration tab is the same as opening any other pane:
- Press
Ctrl+n. - Navigate to the project directory that contains
.dot-agent-deck.tomlwith[[orchestrations]]. - Cycle the Mode field (
Left/Rightorh/l) until the orchestration name appears. - Press
Enter— the deck opens a tab with a pane for every role.
For the full reference, examples, and configuration options, see Orchestration.
Working with Modes
Modes let you pair an agent session with live command output in a tabbed workspace — useful for keeping test runners, log streams, or kubectl output visible alongside your agent. They are defined per-project in .dot-agent-deck.toml.
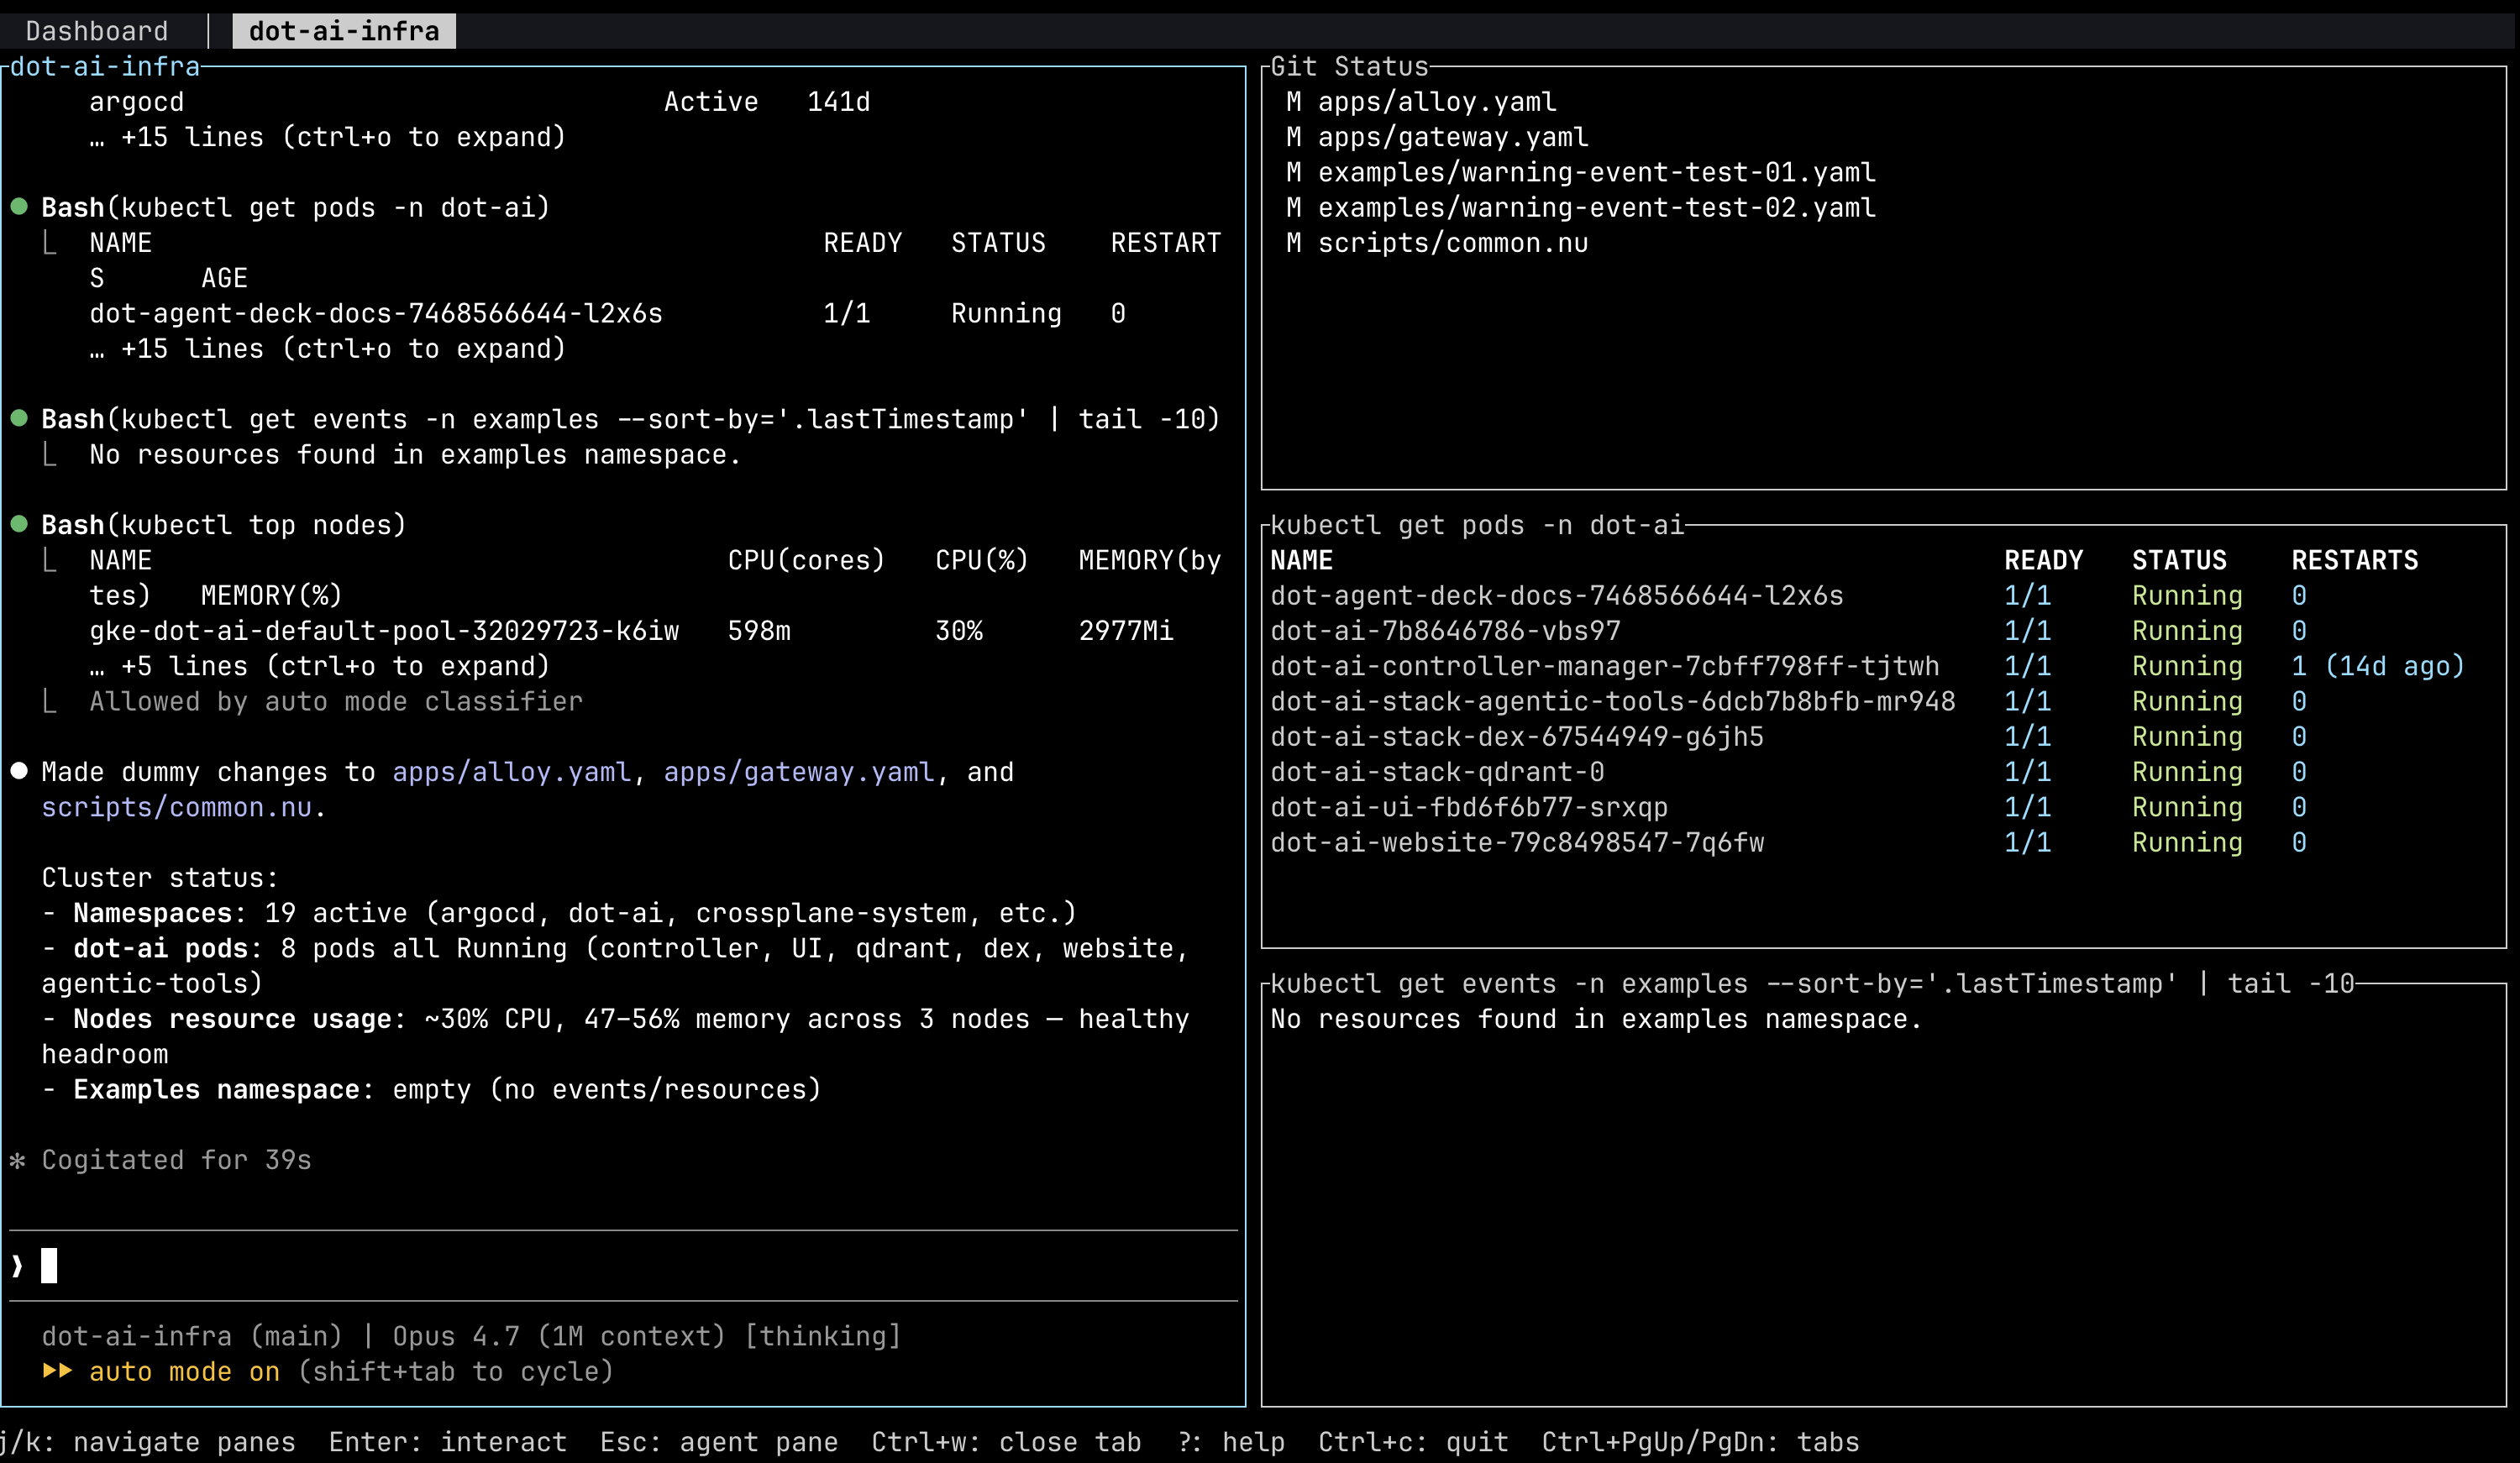
To set one up, let an agent generate the config (Ctrl+d then g), run dot-agent-deck init for a starter template, or write [[modes]] blocks manually. Then press Ctrl+n, navigate to the project directory, cycle the Mode field to your mode name, and press Enter.
For the full configuration reference and more examples, see Workspace Modes.
Scheduled Tasks
Scheduled tasks let the daemon spawn an agent (or run a command) on a cron schedule — a nightly review, a recurring digest, a periodic health check — without you being at the keyboard. They are defined globally, so they apply across every project.
The fastest way to create one is to let an agent author it: press Ctrl+n, cycle the Mode field to schedule, and the throwaway pane walks you through building the entry. Or press s on the dashboard to open the Scheduled Tasks manager and choose [Add a]. Every schedule needs a command that launches a claude or opencode agent — directly (claude, opencode) or via a wrapper like devbox run agent-new — which is what gives the run full status tracking.
For the full reference — cron syntax, the global config file, tab reuse, and supervisor recipes — see Scheduled Tasks.